KAMAR Update - November 2027
We've released an update to KAMAR - find out what's in it! Due for Release - this week!
Posted on Wednesday 4 November, 2026
This update includes changes to the Data Dashboard and Timetable Changes.
Data Dashboard Changes
This update adds four things:
- Markbook Sets in formulas and Result Columns
- A more capable formula calculator
- Per-subject formulas (Subject Calc Columns)
- An AI Assistant that can set up dashboards and write formulas for you
Each one is explained below.
Markbook Sets
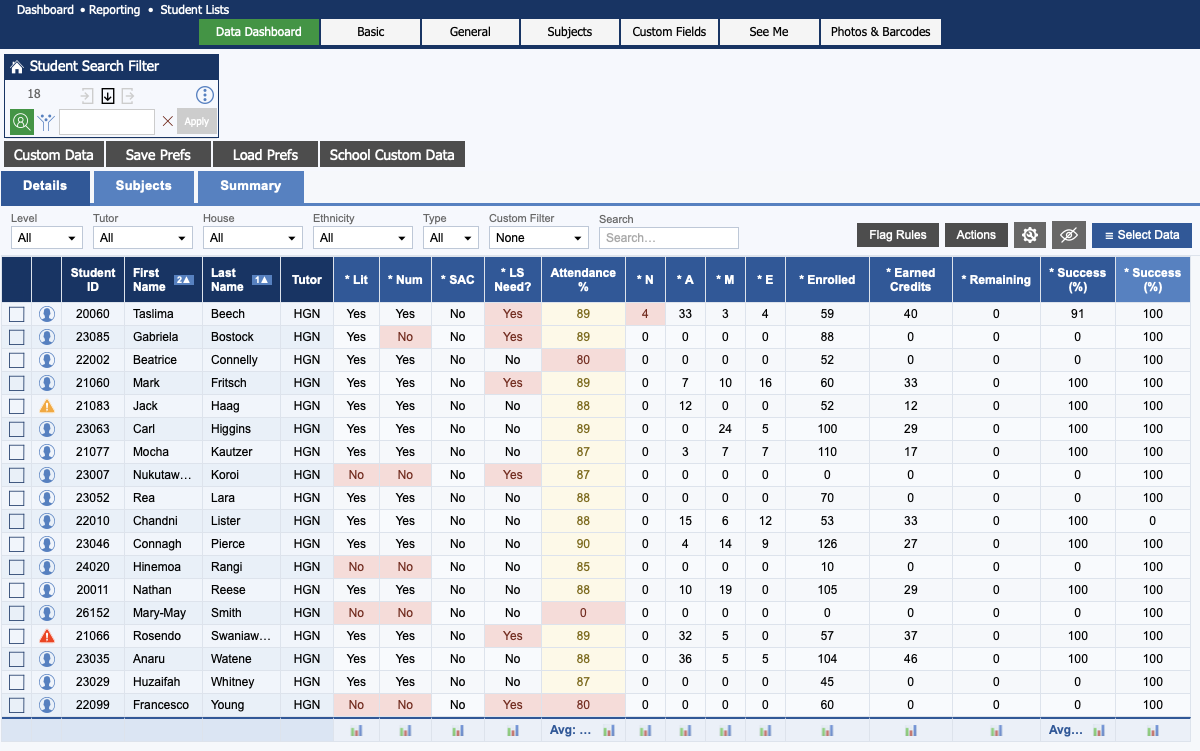
Until now, a formula or Result Column had to name each assessment (TNV). That meant every dashboard needed editing at the start of each year. Formulas and Result Columns can now point at a Markbook Set (A-F) instead. If your school files the same kinds of assessment into the same Set each year (for example, all internal achievement standards in Set A), your dashboard keeps working without changes.
USING A SET IN A FORMULA
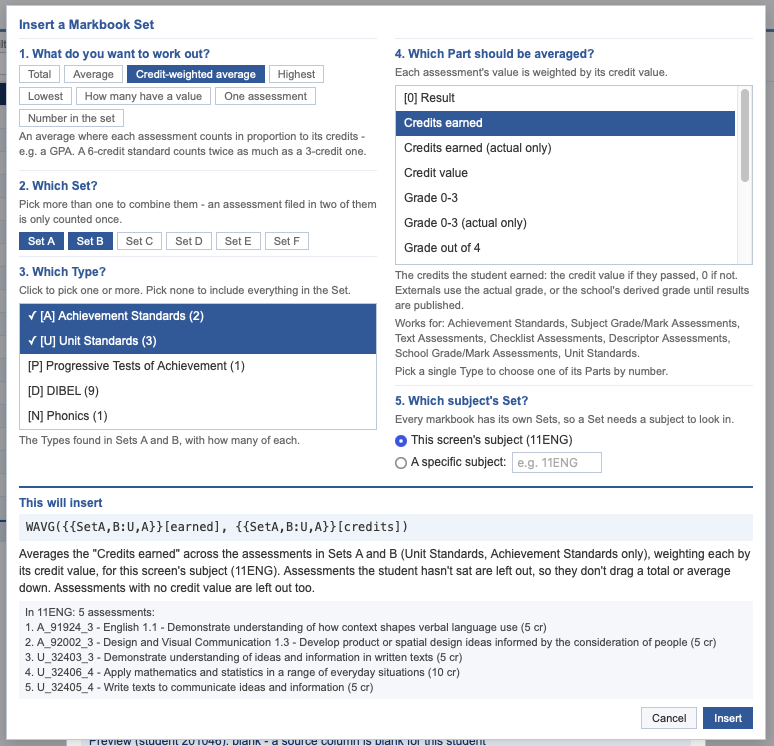
In the Calc Column dialog, click the new "{{ }} Insert Set" button next to "Functions". It walks you through five steps:
- What to work out: Total, Average, Credit-weighted average, Highest, Lowest, How many have a value, One assessment, or Number in the set
- Which Sets: one or more of A-F
- Which kinds of assessment: for example, only Achievement Standards
- Which value: credits earned, grade, weighted result, and so on
- Which subject: this screen's subject, each subject, or a specific subject code
It then shows the formula, a plain-English description of it, and the list of assessments it covers.
You can also type Set references yourself. Some examples:
- Credits earned in Set A - SUM({{SetA}}[earned])
- Credit-weighted GPA (E=4, M=3, A=2) - WAVG(CHOOSE({{SetA}}[grade], 0, 2, 3, 4), {{SetA}}[credits])
- Number of Excellences in Set A - SUM({{SetA:A}}[grade] = 3)
- Number of assessments in Set A - {{SetA}}[count]
Notes:
- Named values such as [earned], [grade], [credits] and [weighted] pick the right value for each kind of assessment. One formula therefore works across a Set that mixes Achievement Standards, Unit Standards and school-based assessments. You can still use a part number such as [11]. If you do this on a Set with mixed assessment kinds, the preview warns you.
- Assessments a student hasn't sat are left out, so they don't pull an average down. An assessment the student sat but didn't pass still counts.
- The formula preview lists the assessments each Set contains for that subject. If a number looks odd, check the list first.
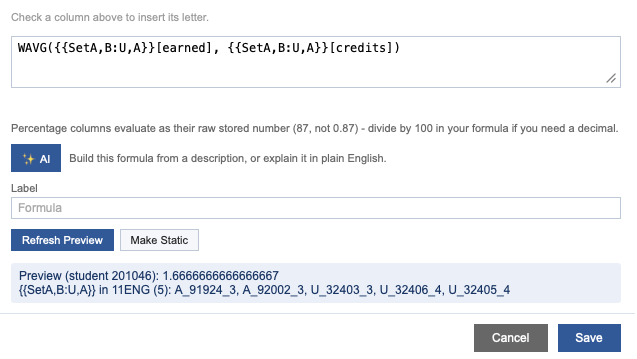
- "Make Static" (Formula mode, Details tab only) replaces the Set references with the actual assessments, which locks the formula to this year's list.
SET RESULT COLUMNS
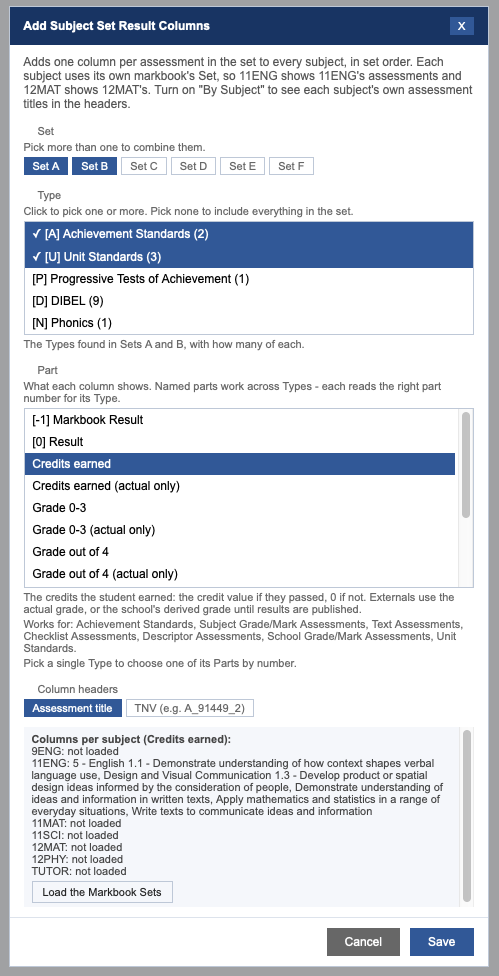
Under Select Data > Calculated, click "+ Add Set Result Columns". This adds one column for each assessment in a Set. You choose:
- the Sets
- the kinds of assessment
- what each column shows (by default, the Markbook result)
- whether the headers show the assessment title or the TNV
Column widths, formatting and sort order are tied to each column's position in the Set, so they carry over to next year's assessments.
On the Subjects tab, "+ Add Subject Set Result Columns" does the same for every subject group at once. Each group gets columns from its own markbook's Set.
Formula Calculator Changes
New functions:
- WAVG(value, weight) - weighted average, such as a GPA weighted by credits
- CHOOSE(value, ...) - turns a grade into your school's own point scale
- IFSAT(assessment, value) - gives a value only when the student has a result for that assessment
Every function is listed with an explanation under "Functions".
Calc Columns can use other Calc Columns. You can build in steps. For example, a "Subject GPA" column can feed a "Dux score" column that combines it with attendance. When you edit a column, the picker lists your other Calc Columns. Chains can be up to 5 columns deep. The dashboard won't let you create a loop, or delete a column that another column still uses (it tells you which one). Each column's card shows what uses it.
Using per-subject values in a student formula. A student-level formula can now use a subject field or Subject Calc Column as a list, with one value per subject the student takes, inside SUM, AVG, MIN, MAX, COUNT, PRODUCT or WAVG. For example, AVG(G), where G is "Subject GPA", averages the student's GPA across all their subjects. The preview shows the value used for each subject.
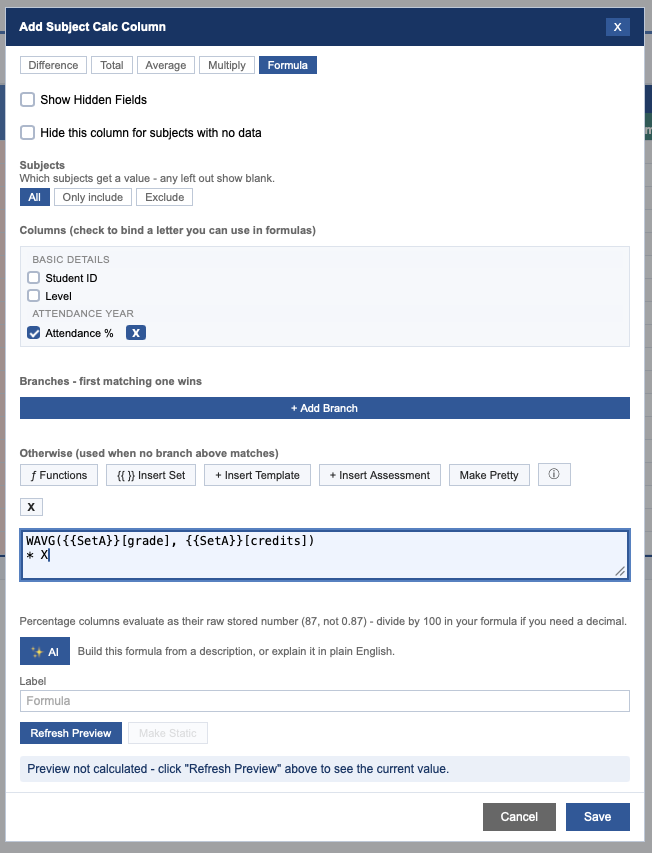
Subject filter. Choose All / Only include / Exclude and type subject codes one per line. For example, exclude TUTOR so it never gets a GPA or counts towards an average.
Per-Subject Formulas (Subject Calc Columns)
On the Subjects tab, "+ Add Subject Calc Column" creates a formula that is calculated separately for each subject a student takes. It appears as a column inside every subject group.
For example, add a Subject Calc Column called "Subject GPA" with the formula:
WAVG({{SetA}}[grade], {{SetA}}[credits])
Each subject gets its own GPA, worked out from that subject's own Set A. You don't need a separate formula for each subject.
Subject Calc Columns can use other Subject Calc Columns for the same subject, and student-level Calc Columns (the same value for every subject). Use the Subject filter to leave out subjects such as TUTOR.
Make Static isn't available for Subject Calc Columns, because each subject's Set holds different assessments.
AI Assistant
You can now describe what you want in plain English, and the AI Assistant will change the dashboard for you. It uses the AI provider your school has already set up (Claude, ChatGPT, Gemini or Copilot)
WHO CAN USE IT
The AI button appears only when both of these are true:
- your school has an AI provider set up.
- the staff member has the AI Assistant security privilege.
WHAT IS SENT TO THE AI PROVIDER
Only column names, your dashboard settings, formatting presets, and quick filter lists such as levels and tutor groups. No student data is ever sent.
DASHBOARD ASSISTANT
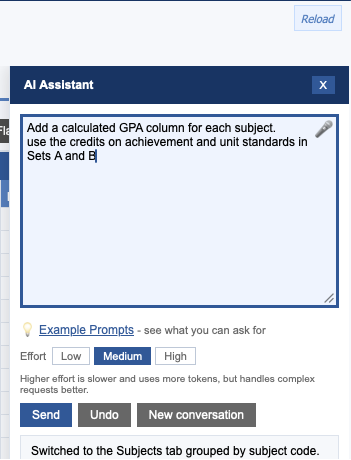
Click "AI" next to "Select Data". Type a request, for example:
"Show attendance for the past 2 weeks and make students below 90% stand out"
The Assistant turns on the right data and formats the column using your existing attendance colour preset. It also sorts the lowest students to the top. Changes appear straight away. The panel then shows:
- a short summary
- a list of everything it changed
- anything it couldn't do
"Undo" reverses the AI's last change, and you can keep pressing it to step further back. Undo also removes any manual edits you made after that AI change.
What it can do:
- show, hide, order, rename and lock columns.
- turn data categories on and off.
- sort, quick filters and custom filters.
- conditional formatting and colour presets.
- Flag Rules and Summaries.
- Subjects tab layout.
- new formula columns ("add a Level 2 GPA column and sort by it").
Follow-up requests
You can build on a request ("make it red instead"), because the Assistant remembers the conversation until you click "New conversation" or reload. Each request is checked against the dashboard as it currently is, so edits you make
by hand between requests are kept.
Questions
If a request could mean two different things, the Assistant asks you first. Click an answer (or type your own) and press "Continue".
Example Prompts
Click "Example Prompts" for a searchable list of ready-made requests. Clicking one puts it in the box for you to edit before sending.
Effort
Choose Low, Medium or High. Higher effort is slower and uses more of your school's AI usage, but handles complex requests better. Medium is a good default.
Dictation
You can dictate your request instead of typing. On a Mac, press Fn twice. On Windows, press Win + H.
The line under each result shows the provider, the time taken and the tokens used, so you can keep an eye on usage.
FORMULA ASSISTANT
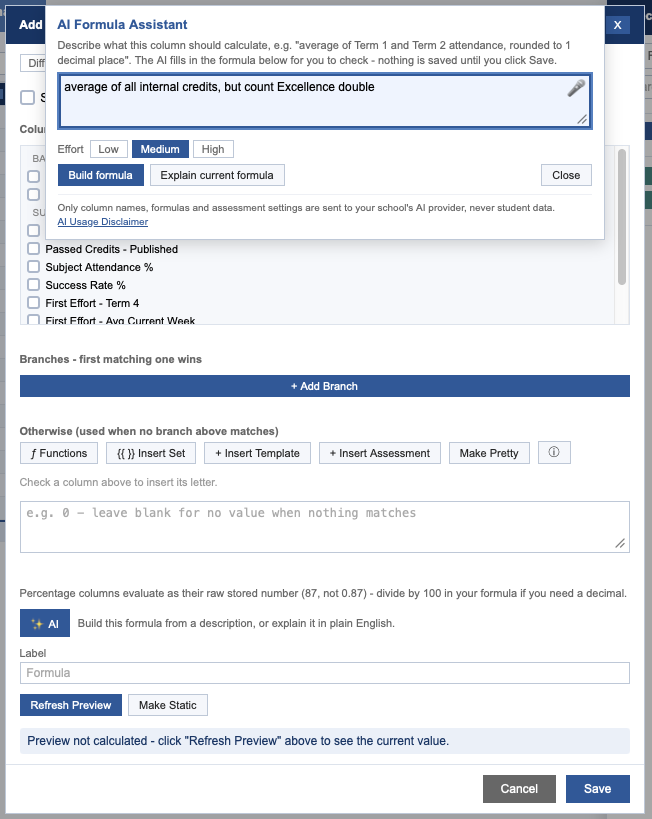
In the Calc Column dialog, the "AI" button below the Insert buttons offers two options:
- Build - describe the column you want, e.g. "average of all internal credits, but count Excellence double". The Assistant puts the formula into the dialog as an unsaved draft. Check the preview, then click Save as normal. If the formula needs data that isn't on the dashboard yet, that data is loaded for you. New columns will automatically be added to be used in the calculation if required
- Explain - gives a plain-English explanation of the current formula without changing it. This is handy for a dashboard someone else built.
AI on the Statistics Screens
The Statistics screens have their own "AI" button. It can change:
- the layout (rows and columns)
- values, percentages and filters
- comparisons between datasets
- hidden rows and columns
- formatting
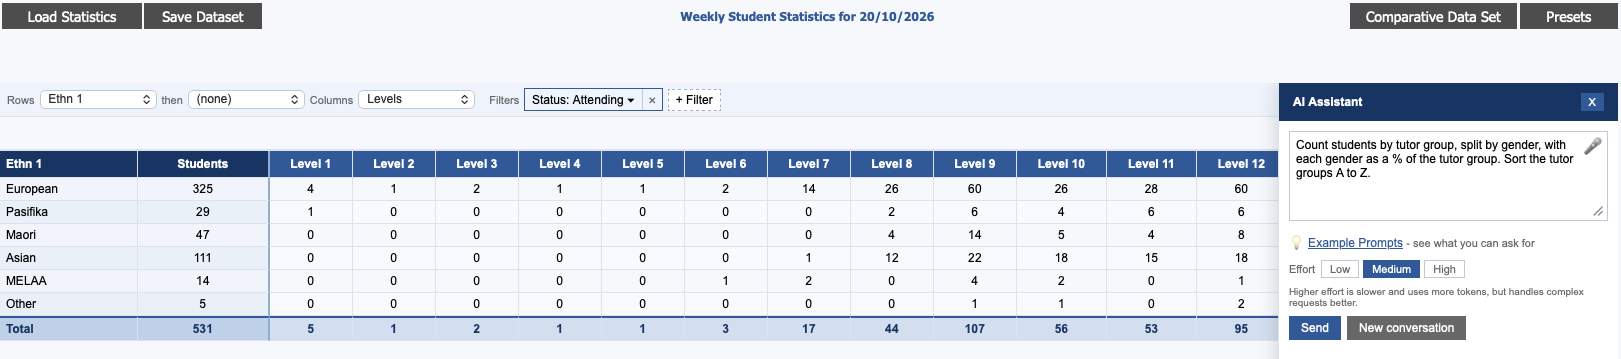
For example: "Count students by tutor group, split by gender, with each gender as a % of the tutor group. Sort the tutor groups A to Z.”.
Timetable Changes - New Tools
Two new tools have been added to Timetable Changes, to assist you with the timetable creation process.
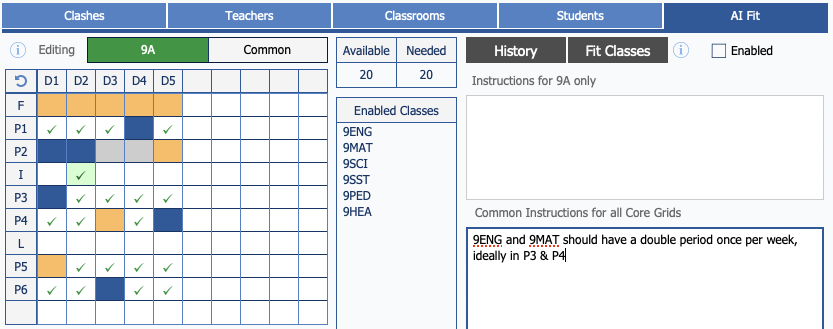
Core Grid Occurrences - add the number of occurrences each core subject should have. If you're manually mapping subjects to time slots, this gives you something to check against. If you're using AI Fit, this tells the AI how many occurrences each subject needs.
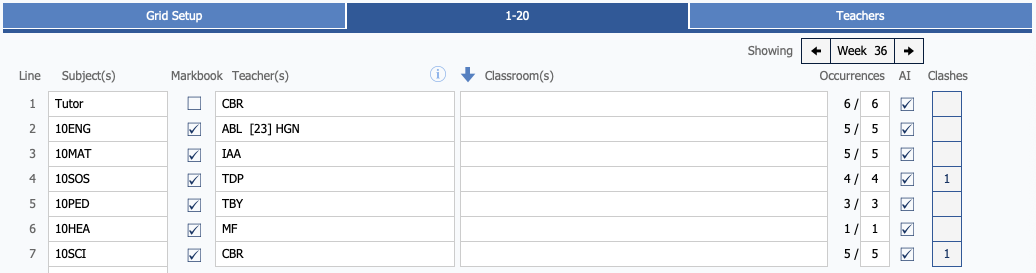
AI Fit for Core Grids - get an AI to help with placing subjects on core grids, taking into account teachers, rooms and subjects.
** Requires you to have an account with one of the AI models in the list, which you'll find in Setup > Server > AI Integrations.